Set-Up
Create account on the Emulab cloud infrastructure at emulab.net and wait for approval
Once approved for an account fill out your information- make note of the following two points:
-
When filling out information for your account ensure that you put “Infosphere” for both the group AND the project
-
Please note: if you forget, this can be set after logging into Emulab and clicking the “Edit Profile” link
-
Select **bash **under the shell portion
-
Create a public RSA (SSH) key on your local ‘nix machine under a bash shell.
Add the SSH key to your account by selecting “My Account” and then “Edit SSH keys” on the left hand side of the page. This is where you would paste your SSH key from the prior step.
Email Josh Kimball with your GitHub username to gain access into the GitHub repository
-
Elba email address: Elba@cc.gatech.edu
-
If you are unfamiliar with GitHub, please create an account at GitHub.com
Using your computer terminal, create a directory on Emulab’s file share, users.emulab.net, by executing the following commands:
-
Please note: substitute for your Emulab account username
-
Example: JaneDoe@users.emulab.net
ssh @users.emulab.net
   cd /proj/Infosphere
   mkdir
Use the following webpage to clone the ‘Alpha release of Project NewElba’ into your directory: https://github.com/coc-gatech-newelba/NewElbaAlpha.git
NOTE: if you do not gain permission from Josh Kimball, you will not be able to access this page.
In your terminal, enter the directory where you would like to copy the repository
<code>cd ~/
</code>
Clone the repository from https://github.com/coc-gatech-newelba/NewElbaAlpha.git
Navigate into the directory of the repository you just created and replace with the repository’s name (NewElbaAlpha)
cd NewElba Alpha
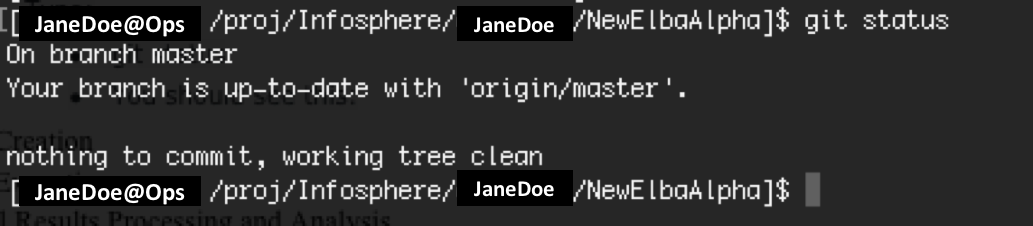
Type:
-
git status
-
You should see this:
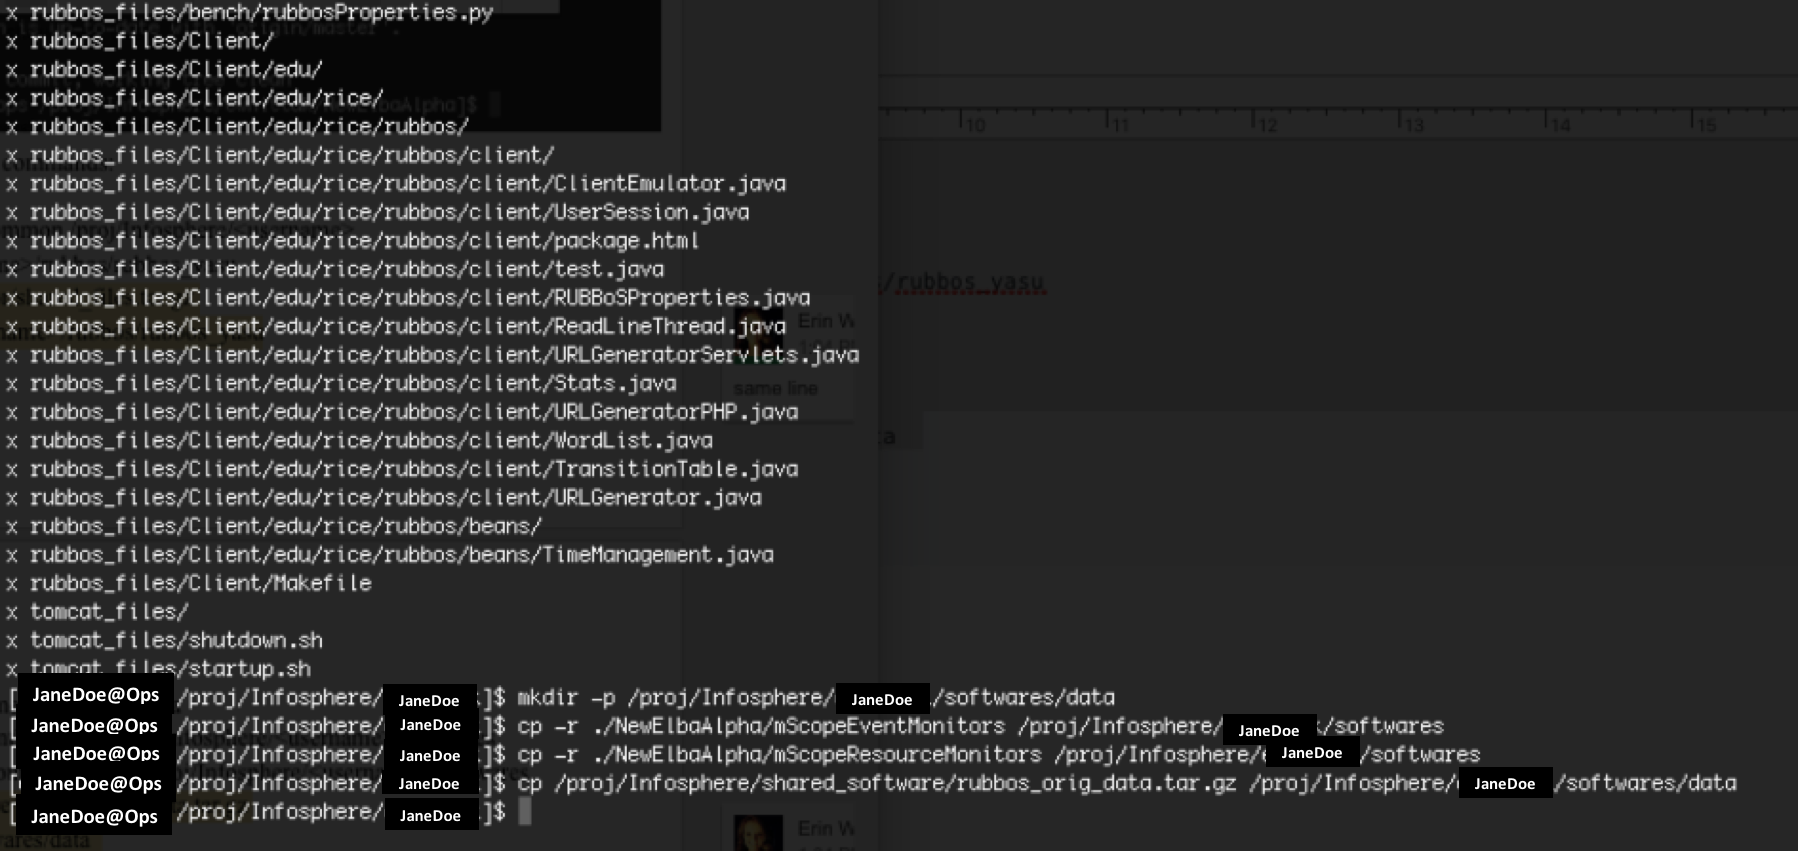
Next, execute the following commands:
<code>cd /proj/Infosphere/
cp -r ./NewElbaAlpha/generator/common /proj/Infosphere/
mkdir -p /proj/Infosphere//rubbos/rubbos_yasu
tar -zxvf ./NewElbaAlpha/generator/shared_files.tar.gz --directory=/proj/Infosphere//rubbos/rubbos_yasu
mkdir -p /proj/Infosphere//softwares/data
cp -r ./NewElbaAlpha/mScopeEventMonitors /proj/Infosphere//softwares
cp -r ./NewElbaAlpha/mScopeResourceMonitors /proj/Infosphere//softwares
cp /proj/Infosphere/shared_software/rubbos_orig_data.tar.gz /proj/Infosphere//softwares/data  </code>
This will result in the following activity in terminal:

Experiment Description
Follow this link if you want to execute an experiment other than the topology 1-1-1-1.
The example experiment uses an n-tier application benchmark, RUBBoS. RUBBoS is modeled after a commercial web-based bulletin board system, SlashDot. The benchmark natively supports Read-only and Read-Write workloads, and it enables users to specify the workload in terms of the number of concurrent client requests. For this tutorial, we will use workloads ranging from 1000 to 7000. This example experiment features a system topology composed of:
-
1 Apache HTTP server
-
1 Tomcat Application server
-
1 CJDBC Middleware server
-
1 MySQL DB server
Note: we generally refer to this as a 1-1-1-1 topology where each number corresponds to the number of deployed Web, Application, Middleware and Database servers in that order.
[googleapps domain=”drive” dir=”file/d/0ByvytIe8I-qpbDhDV1ZPU0RjcVU/preview” query=”” width=”640” height=”480” /]
Note: The video above takes you through executing an experiment. However, the most up to date information is listed below so put precedence on the below instructions and use the video as support.